Saturday, September 24, 2011

Failed Macarons

*Big sigh*.

So this weekend I had attempted to make macarons for the very first time. I got a little ambitious and wanted to make two batches, one chocolate and one some other funky flavour, but I didn't even pass the first batch.

Just look at all this spoilt cookies:


This is from the first batch, it was too runny and I piped them on too big, so they kind of spread and joined each other.

Second batch, and I had piped them on perfectly!

Let them sit for an hour till a hard shell develops then proceed to bake.

Alas!

They were stuck on the parchment paper and proceeded to break.


They did have the little 'feet' at the bottom though.


Dang. You'd think the batter was wasted. However it didn't hinder me from eating macaron batter *embarrassed*. Those three spots on in the picture went into my mouth.

I looked at possible reasons my macarons failed and found something on Serious Eats:
  
A Few Tips
  • Sift your ingredients, multiple times if necessary. You want your ground nuts to be powdery. No lumps! Almond and icing sugar mixture may be pulsed in a food processor to make finer.
  • Use old egg whites. No really, leave them out for three days at room temperature if you don't mind waiting for that long. Using fresh egg whites is more likely to result in macarons that are too fragile and flat.
  • To make it easier to remove the macarons from the parchment paper after baking, pour a little bit of water underneath the paper. After a while the steam will have loosened the macarons.

Ah! Some helpful little pointers to help me along! I'm definitely not going to give up and trying them again this week.

Monday, September 19, 2011

& Now, Chocolate Chip Muffins!

There you go. The product of my test lab a.k.a kitchen. Following my hankering need for something chocolate and also because I had leftover ingredients from the blueberry muffins, I have transformed the blue dough-blobs into its popular cousin, CHOCOLATE DOUGH-BLOBS.

Hellooooo lover.


I had bought semisweet chocolate chips for an upcoming recipe, but ended up using them on these babies instead. The recipe is basically the same as the previous muffins, except that I incorporated chocolate and omitted blueberries of course.


I love the smooth texture derived from the yoghurt and every mouthful is moist. You can take out the lemon zest if you want, but I kept it in for the extra zing. I'm sorta badass.

After the previous picture I popped the thing in my mouth. You can tell how enthusiastic I was by the blurry picture.
I totally ripped it off after snapping the pictures, but don't you love the pretty polka-dot casing? I bought it way back during my Perth trip last year and only got around to using them now. So pretty!


Wanna get people on your side? Make these. Distribute to said people. Let said people chomp on these rich motive-induced treats. Witness the change.


Moist Chocolate Chip Muffins
Modified from blueberry muffin recipe

Ingredients:
71 grams unsalted butter, softened
1/3 cup sugar
1 large egg
3/4 cup sour cream or plain yoghurt
1/2 teaspoon grated lemon zest (optional)
1 1/2 cups all-purpose flour
1 1/2 teaspoon baking powder
1/4 teaspoon baking soda
1/4 teaspoon salt
1/2 cup semisweet chocolate chips (more if desired)

Preheat oven to 190C.

Line a muffin tin with 10 paper liners or spray each cup with a nonstick spray. Beat butter and sugar with an electric mixer until light and fluffy. Add egg and beat well, then yoghurt and zest. Microwave half the chocolate chips, stir the melted chocolate and fold into batter mixture. Put flour, baking powder, baking soda and salt into a sifter and sift half of dry ingredients over batter. Mix until combined. Sift remaining dry ingredients into batter and mix just until the flour disappears. Gently fold in your remaining chocolate chips, but keep some aside for topping. Fill each paper liner up to 3/4 full and sprinkle last of chocolate chips. Bake for 25 to 30 minutes, until a tester inserted into the center of muffins comes out clean.

Thursday, September 15, 2011

Smurfberry Muffins

This week, I managed to catch the new Smurfs movie and I got to say, it was more pleasant than I expected! I loved the cast (especially Hank Azaria, he was a hoot doing Gargamel) and the little Irish smurf. Who's doing the voice-over for the guy does anybody know?

Anyway, it could have been partly subconscious but I suddenly really wanted to bake blueberry muffins. Or it could have not been anything to be related to the movie at all. Either way I still want my muffins.


Pop one in your mouth! Or two. Or ten.

It had always occurred to me that it's not that easy to get a hold of blueberries in Singapore. Easily possible, but not always accessible. I was so happy to find stacks of them in my neighbourhood supermarket!

You'll need about 3/4 cup. In my case it happened to be the around 3/4 of the box as well.

Mix batter well and fold in the blueberries.

I expected them to be messy as I had read stories of people making blunders because the juice was seeping out, but in my case folding the batter was a breeze! I suppose it had something to do with the thick batter, and also I had kept the blueberries cold (you can use frozen blueberries as well).

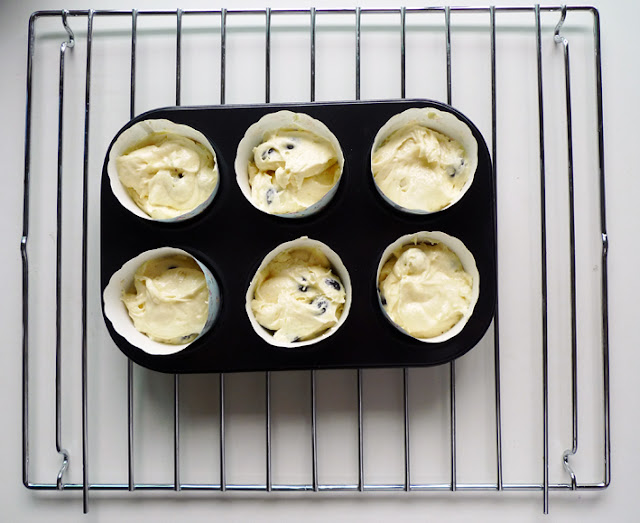
Using an ice-cream scoop or a spoon, fill the paper liners or greased muffin tray up to 3/4 full.

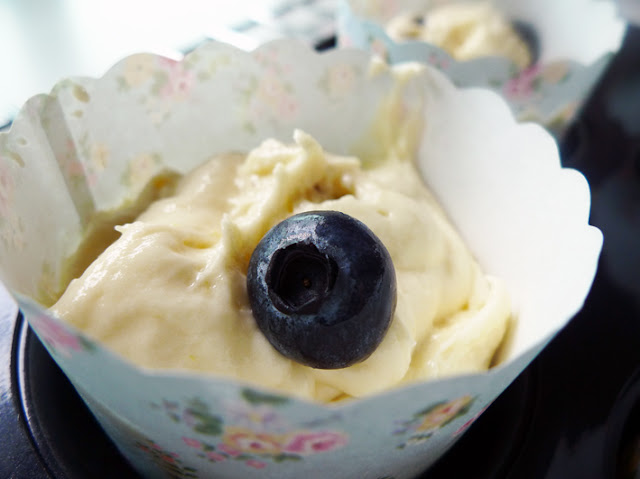
Dot the top with one or two more berries so you'll have them peeking out the dome when it's finished!

I managed to fill about 9 paper liners, but they turned out to be a little much. Try to fill it a TEENSY bit less than 3/4 if you can!

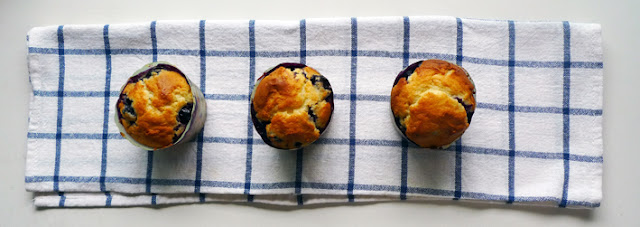
Done! Let cool or devour straightaway.

Check out the yummy purple juice pooling around the muffin.

Split one and butter your muffin. That's right. Butter your muffin gooood.

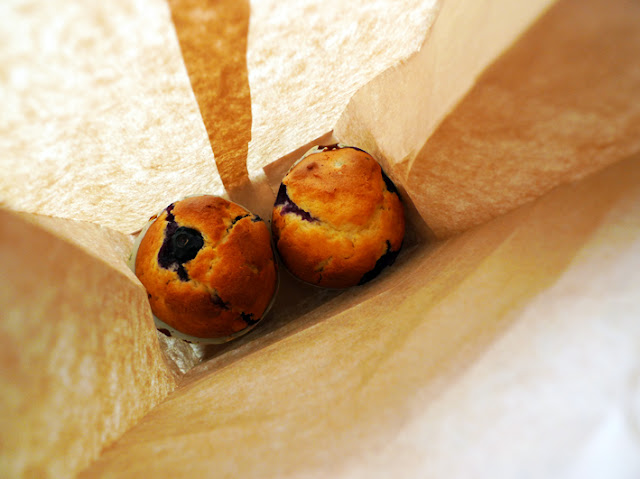
& half of the rest you pack into paper bags to give to your loved ones!

These were really very good and they weren't too tart or too sweet as I had thought they would be. The sweetness of the muffin complemented the berries, and I really wouldn't say no to pairing these with a good cuppa tea.

Mmm. Muffins & tea. That's the life.


Perfect Blueberry Muffins
Recipe adapted from Smitten Kitchen (Cook's Illustrated)

Ingredients:
71 grams unsalted butter, softened
1/2 cup sugar
1 large egg
3/4 cup sour cream or plain yogurt
1/2 teaspoon grated lemon zest
1 1/2 cups all-purpose flour
1 1/2 teaspoon baking powder
1/4 teaspoon baking soda
1/4 teaspoon salt
3/4 cup blueberries, fresh or frozen

According to Smitten Kitchen:

Preheat oven to 190C.

Line a muffin tin with 10 paper liners or spray each cup with a nonstick spray. Beat butter and sugar with an electric mixer until light and fluffy. Add egg and beat well, then yogurt and zest. Put flour, baking powder, baking soda and salt into a sifter and sift half of dry ingredients over batter. Mix until combined. Sift remaining dry ingredients into batter and mix just until the flour disappears. Gently fold in your blueberries. The dough will be quite thick (and even thicker, if you used a full-fat Greek-style yogurt), closer to a cookie dough, which is why an ice cream scoop is a great tool to fill your muffin cups. You’re looking for them to be about 3/4 full, nothing more, so you might only need 9 instead of 10 cups. Bake for 25 to 30 minutes, until tops are golden and a tester inserted into the center of muffins comes out clean.

Monday, September 5, 2011

Lemon Crumb Squares


Hello everyone. It's been almost A WHOLE YEAR since I've updated this space and I am really sorry for disappearing on you! It's just that I've been busy with school and stuff and time really flies by. Recently though, I felt like I'm losing touch with everything I love to do and I remembered this blog and how therapeutic and kind it has been to me. I promise I'll try to update more!

Before I rattle on with my sob stories let's Hoover this place up and visually devour LEMON CRUMB SQUARES.

Pack first crumb layer, and then spread on the lemon mixture and sprinkle remaining crumbs on top.


I left my camera on the table to clean up the dishes while the pan was in the oven and my brother decided to photo-bomb. Great. Now you're on my food blog Fariz.

After baking, let cool for 30 minutes then refrigerate.

I couldn't wait till it completely cooled and decided to cut myself a piece!


Sweet lemony richness sandwiched between an oat-ey crumble. 
Pop pieces in between your afternoon tea or coffee. Yum.


Sorry for the different lighting! I was trying to get a good angle to photograph the baked good but it was getting dark and now my pictures have different colour treatments. But s'all good.

I used this recipe and dayum son it is delish! And easy. Really. I hardly broke a sweat making these babies.

And now you can too! (By the way my brother just asked for a second slice. Good news!)


Creamy Lemon Crumb Squares
Recipe adapted from The Pioneer Woman

Ingredients:
Crumb mixture

1-1/3 cup All-purpose Flour
1/2 teaspoon Salt
1 teaspoon Baking Powder
1 stick (1/2 Cup) Butter, Slightly Softened
1 cup Brown Sugar (lightly Packed)
1 cup Oats


Lemon mixture
1 can (14 Ounce) Sweetened Condensed Milk
1/2 cup Lemon Juice
Zest Of 1 Lemon

Preheat oven to 176C.

Mix butter and brown sugar. Sift baking powder, flour and salt into the cream and add in oats. Mix until it form fine crumbs. Press half of crumb mixture into bottom of 8 x 11 pan. In a separate bowl, mix lemon juice, zest and condensed milk. Spread over pressed crumb base and sprinkle the rest of the crumb mixture on top (do not press).

Bake for 20-25 mins or until golden brown.

Allow to sit for 30 mins to cool, cut into squares but pop it in the fridge first! When it is nice and cold you can take out a square and enjoy it with your favourite beverage.

Enjoy!
Related Posts with Thumbnails