Monday, September 13, 2010

AUSTRALIA, SOON

G'day mate!

I contemplated squeezing in a recipe post before I leave for Perth for 8 days from Wednesday onwards, but figured that I best leave it for after my school trip so that I don't feel so rushed. Yeap, it is a school trip and I just got my vaccination jab today for the first time (I think). The doctor also drew blood to test for my blood type, and was gentle, but unfriendly.

I don't like when doctors are unfriendly. To me, doctors have some sort of a childhood relation so when they are unfriendly, you feel like, Barney the dinosaur has been unfriendly or something. Such a disappointment.

Anyway, before he stuck the needle in he told me to look away, but brave ol' me said I wanted to look, heehee. I still have a bruise from it. *poke* Ow.

I don't think I'll be bringing my laptop to Perth so I'll not be updating for a full week. I promise an abundance of pictures though! I'm quite excited :)


***

A few photos that caught my fancy, categorized-

Recipe inspiration:

Sugar cookies are pretty versatile when it comes to shape and colour.

I've been wanting to make ice pops for quite some time, would be so blissful when licking them under the sweltering heat here in Singapore.


Crazily adorable sheep cake pops from the amazing Bakerella.


And the occasional savoury dish that catches my fancy:

Pesto pasta. Pesto is just so delicious and is about 7-8 dollars per bottle the last time I checked.
I think I'm gonna get one soon and whip up a simple pasta or spread it on a chicken sandwich.


Style inspiration:

I love collared dresses like this pretty one on Alexa Chung.


This ensemble has sort of a 1930s feel. I like her leather purse and her felt hat.


Looking fabulous in NYC


& a little vintage:


Gorgeous shot of Brigitte Bardot.


Till my trip is over,
xoxo


Saturday, September 11, 2010

Twist, Lick & Dunk

Today, we're going to make one of our beloved childhood snacks.

I used to eat them almost every other day, and when they come in a package of three, the person I'm sharing it with would eye each other up until the shameless person grabs the last one. Or we usually fight over it.

We are going to make:


HOMEMADE OREO COOKIES!


YES YES YES

At first I thought of making some raspberry shortbread cookies because I already had raspberry jam on hand, but then I came across this oreo recipe and knew that I'd be making these babies.


When I checked my baking stash, I realised that I already had most of the ingredients. That's what I love about baking! You can store ingredients for weeks and still use them, unlike cooking where you have to buy fresh ingredients or the quality would not be the same. (Plus I am also lazy to go down to buy ingredients everytime)


Mix ingredients to combine


At this stage, you've got to be careful and mix them at low speed. When I turned on my electric mixer to combine all the dry ingredients, I had a sudden *POOF* of powder in my face. Not very domestic goddess-like, really.


After adding butter and egg


I usually grease my baking tray with butter then stick on parchment paper before dropping batter, and these butter package wrappers come in so handy.


Drop rounded teaspoonfuls of batter on tray, then smush the top to make them slightly flatter.


After cookies have cooled, spoon or pipe on filling then sandwich the cookies together

OOOH. This part is fun! I'd pair the cookies according to their size, and then plop the filling on. I didn't know where my pastry bag was so I could not pipe them on. Doesn't matter when they're flattened though.


Finished cookies:

MMMM.
And of course, you eat oreos with milk.


I read somewhere that you have to run 2km just to burn off one oreo cookie. If that is true, I'd have to run a friggin marathon considering the amount I gobbled taking these pictures.


Twist. Lick. Dunk.


EAT.

Enjoy.


Homemade Oreos
Recipe adapted from SmittenKitchen.

Ingredients:
Chocolate wafers:
1 1/4 cup all-purpose flour
1/2 cup unsweetened cocoa
1 tsp baking soda
1/4 tsp baking powder
1/4 tsp salt
1 1/4 cup sugar
142 g unsalted butter (1/2 cup + 2 tbsp)
1 large egg

Filling:
113g (1 stick) unsalted butter
113g vegetable shortening
2 cups confectioner's sugar
2 tsp vanilla extract

Preheat oven to 375F or 190C.
Combine flour, cocoa, baking soda, baking powder, salt and sugar on low speed. Add butter, then beat to combine. Afterwards, add egg and beat to combine. Place rounded teaspoonfuls of batter on baking tray and bake for 9 mins, rotating once.

While baking, prepare filling. Cream butter and shortening, then gradually beat in sugar and vanilla. Turn mixer to high and beat till light and fluffy.

Drop filling on cookies and sandwich together. Dunk in milk, eat and faint.

Saturday, September 4, 2010

Ice Cream That Is Not Ice Cream

These past few weeks, I have learnt several new things from being and not being around people:
  1. If you try too hard, you're doing it wrong (little nugget of wisdom from my older brother).
  2. Things come to you when you don't expect it.
  3. A little effort goes a long way.

These may sound all too familiar but as a close friend mentioned a few days ago, knowing and putting into action are two very different things. That's another nugget of wisdom for you to ponder on. We all have gotten much too comfortable with a routine, that's probably what stops us from doing.

"I began to realize how simple life could be if one had a regular routine to follow with fixed hours, a fixed salary, and very little original thinking to do." - Roald Dahl

That's a pretty dull life.


On a lighter, fun note, guess what I made today?


 ..CUPCAKES IN CONES!

Aren't they precious?!


I saw these while perusing through Chockylit's cupcake blog archives and thought it was such a cute idea. Cupcakes and frosting that look like ice cream? Genius! I love pretty food. Food that is presentable is half a battle won.
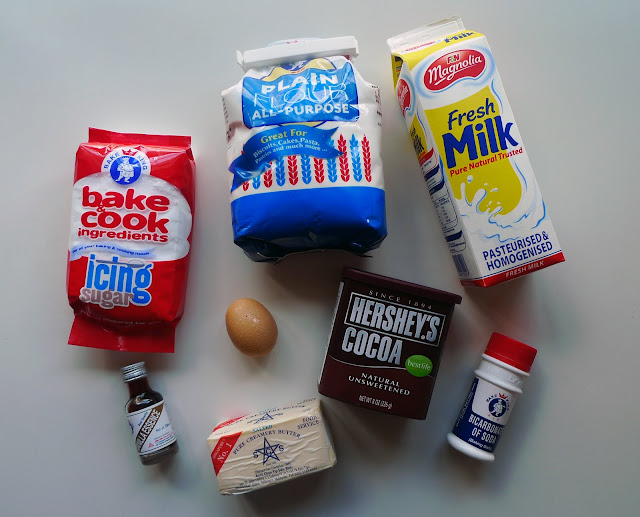

Almost all the basic necessities


Measure everything out..


And mix!


I was a little worried about how the cupcakes were gonna be balanced on the baking tray, so I cut an X through the base of cupcake holders and poked the cones through.
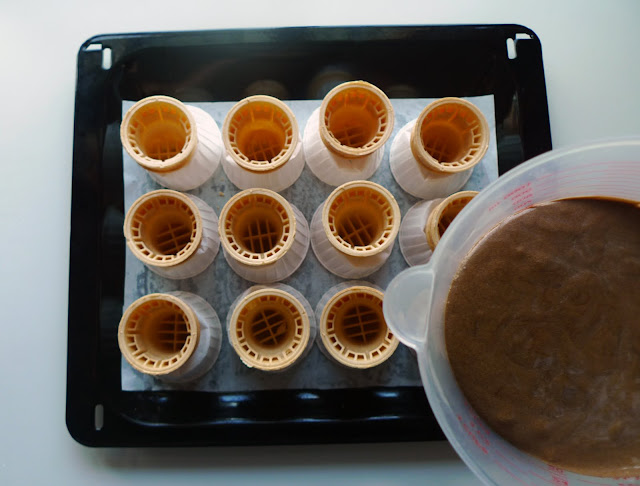

Transfer batter into something with a pour spout


I halved the recipe, and in the end only had enough batter for 9 cones. Pour only 2/3 into cone because the batter will rise like crazy. I had a few overflows, which got me slightly irritated. Also, don't wait too long to bake after filling in batter or cones will get soggy and batter will seep through.
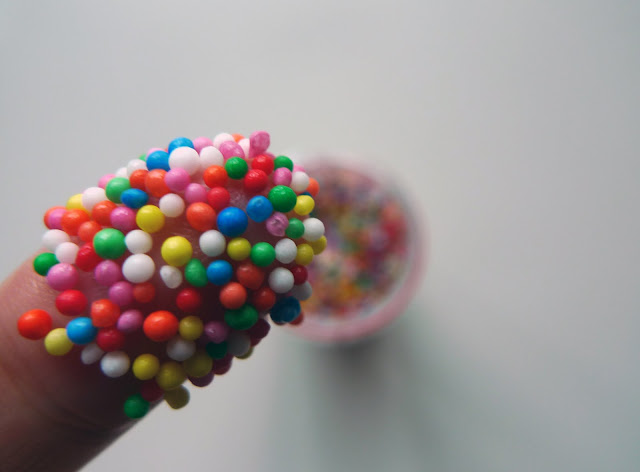

Coloured sprinkles!


I forgot to take a picture of the cones before piping on frosting. You can see how they look like in the Chockylit post, but what does it matter? We want to get to the end, and quick!


.
.
.
.


Ta-dahh!!

I added cocoa to the frosting that my favourite food blogger, The Pioneer Woman, made using this recipe, and it tastes much better than regular frosting but a little too wet to pipe on for a convincing 'softee' look. I added more sugar then added sprinkles!


Conclusion: These were pretty to look at, but I don't think I'd make them again because it required a lot of washing up and they were unstable after frosting was piped on. Quite a number flopped over and the frosting was ruined but still edible, of course. Also, it was a little difficult to eat cake and frosting at the same time without getting frosting on your nose. They were, however, super yummy!


Here's the recipe for those who'd like to make these precious treats:

Ice Cream Cone Cupcakes
Adapted from Chockylit and Tastykitchen

Cupcakes:
1 cup flour
1 cup sugar
1/4 cup (4 tbsp) unsweetened cocoa powder
 3/4 tsp baking soda
3/4 cup milk
1/4 cup (56.7g) butter
1 teaspoons vanilla
1 egg

Preheat oven to 350F or 176C. Measure out everything but egg into mixer bowl. Mix on low speed until incorporated, then beat on high for 2 mins. Add egg, beat on high for another 2 mins. Pour batter into ice cream cones and leave an inch between batter and top of cone. Bake for 20 mins or until cake tester (e.g. toothpick) comes out clean.


Chocolate frosting:
5 tbsp flour
1 cup milk
1 tsp vanilla
1 cup (227g) butter
1 cup granulated sugar
1 tbsp cocoa powder

Whisk flour into milk in a saucepan over heat until it thickens, stirring constantly. Remove from heat and let cool to room temperature. Stir in vanilla. In a separate mixing bowl, cream butter, sugar and cocoa until light and fluffy. Add in flour milk mixture and beat everything until it resembles whipped cream. Here I add more sugar(1/4 cup) to let it stiffen for piping.

OR

Use this buttercream recipe from original Chockylit post for a nicer piped top:

113g butter
3.5 cups powdered sugar, sifted
2 tbsp milk
1/2 tsp vanilla
1/4 cup cocoa powderw

Beat butter until creamy, then add 2 cups of sugar, milk, cocoa and vanilla and beat until combined. Add more sugar to get consistency that you want. Pipe on with a star or rounded tip.

Thursday, September 2, 2010

Food & Musik

A little jumble-wumble of what has been interesting me lately:


Simple fruit salads


Devendra Banhart (with Natalie Portman co-starring in the music video)


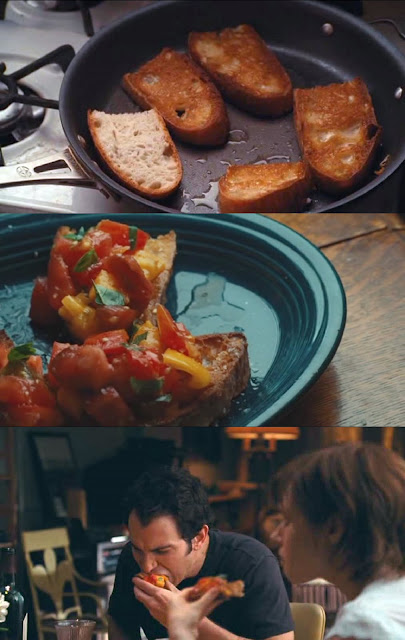
Bruschetta (screencaps from the movie Julie & Julia).
My eyes were widened throughout the whole scene from when the bread was being fried in olive oil then when Chris Messina messily crunched through a bruschetta.


A beautiful cover of Edith Piaf's La Vie En Rose from Pomplamoose.
These musical duo are so amazing and I have been raving about them ever since I found them on Youtube.
To check out all of their work go here.


Come mothers and fathers
Throughout the land
And don't criticize
What you can't understand
~ Bob Dylan, The Times They Are A-Changin'
Related Posts with Thumbnails